
MESH Network Overview
EasyMesh is a basic standard developed by the Wi-Fi Alliance for interconnecting different APs. This standard defines the protocol for interconnecting and controlling APs from different manufacturers.
In the EasyMesh network, there is a Controller role to manage the entire network, and all APs with Agent roles are connected to it (including indirect connections). The Controller role is generally the main wireless router at the home network outlet, which includes the management process of the Controller, and it also has an Agent AP. Of course, this Agent AP is also under the management of the Controller, which is more economical. EasyMesh connects through the more traditional AP+Client method to form a tree-shaped network topology.
The simple understanding of EasyMesh is: it is the traditional AP Client mode + automatic configuration with certain rules (similar to the AC+AP network form). It eliminates the process of users manually configuring SSID passwords in the past, and adds some features to improve user experience. It is a protocol that can automatically connect to form a network with 2 or more wireless router devices.
The EasyMesh protocol is called Multi-AP Specification in the Wi-Fi Alliance, and the latest version is Version 4.
MESH Networking Method
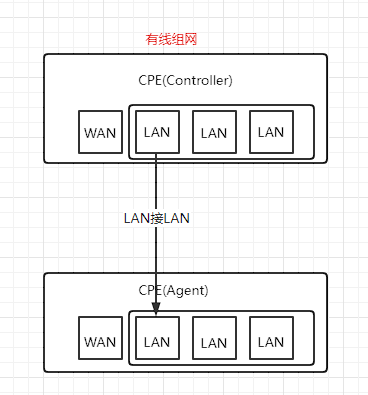
2.1 Wired networking:
CPE supports wired networking of two devices, LAN (main controller) and LAN (slave agent).
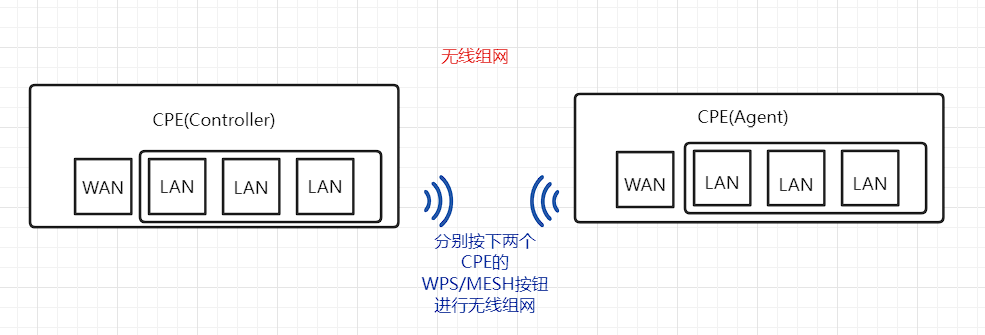
2.2 Wireless Networking:
CPE easymesh Instructions
3.1 After the CPE is restored to factory default, the mesh function is disabled by default (currently supports Mesh networking in routing mode, and will add Mesh networking in wisp mode later)
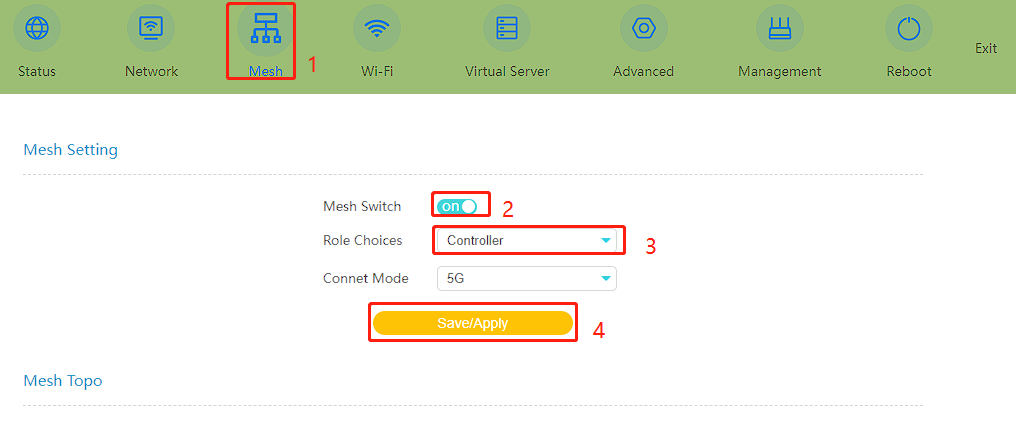
3.2 First confirm that a CPE is the main node Controller (host)
Step 1: After the quick setup is complete, set the CPE to routing mode
Step 2: Enter the USER user web and click the Mesh menu
Step 3: Turn on the Mesh Switch switch
Step 4: Set the role to Controller
Step 5: Click the Save/Apply button to save the configuration
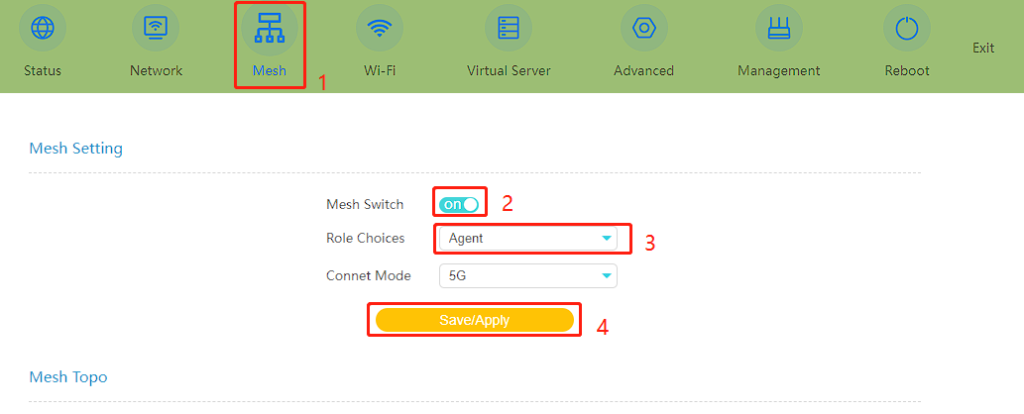
3.3 Since Mesh is not enabled by default, slave nodes also need to be configured.
Step 1: After the quick setup is completed, set the CPE to routing mode
Step 2: Enter the USER user web and click the Mesh menu
Step 3: Turn on the Mesh Switch switch
Step 4: Set the role to Agent
Step 5: Click the Save/Apply button to save the configuration
3.4 After both CPEs are configured, you can use LAN to LAN for wired networking, or press the WPS/MESH buttons of the two CPEs separately for wireless networking (within 3 meters, the CPE blue light flashes during wireless networking, and only one Agent can be added to the mesh network at the same time)
3.5 When the CPE is wired, remove the network cables connecting the primary and secondary nodes, it will automatically switch to wireless networking, and vice versa.
3.6 After Mesh is turned on, the WPS function is only used for Mesh networking and cannot be used to associate other wireless devices. The WPS button function when Mesh is turned on is different from that when Mesh is turned off.
3.7 Two Mesh devices with the role of Controller cannot form a network. You need to change one of the devices to Agent to form a network normally.